Introduction
INVOICEX – BILLING AND INVOICE MANAGEMENT SYSTEMS
Streamline your business’s financial operations with InvoiceX, the leading billing and accounting system for small businesses. Our intuitive platform enhances efficiency and boosts productivity through simplified daily tasks.
Requirements
InvoiceX Web is built using PHP 8.2 with Laravel 10 Framework, VUE 3, MySQL
Minimum Server Requirements
PHP Version
InvoiceX Web requires minimum required PHP version: >= 8.2
Node Version
InvoiceX Web requires minimum required Node version: >= Node v18.0.0 (LTS)
MySQL
InvoiceX Web requires minimum required MySQL version: >= 5.7
Recommended MySQL version: >= 5.7.
MariaDB Version >= 10.2+
PHP Extensions
- Ctype PHP Extension
- cURL PHP Extension
- bcMath PHP Extension
- JSON PHP Extension
- DOM PHP Extension
- Fileinfo PHP Extension
- Filter PHP Extension
- Mbstring PHP Extension
- OpenSSL PHP Extension
- Iconv PHP Extension
- PDO PHP Extension
- Pdo_mysql Extension
- Session PHP Extension
- Tokenizer PHP Extension
- XML PHP Extension
- Zip PHP Extension
Our recommended shared web hosting provider is HostGator, Namecheap, DreamHost, Directadmin, Siteground, Plesk etc.
PHP Memory Limit
max_execution_time = 6000
max_input_time = 3000
memory_limit = 128M
post_max_size = 128MB
upload_max_filesize = 128MB
PHP Functions
Symlink must be required to generate a storage folder
If symlink() is disabled on your hosted server, you will not be able to change any files, images on the application.
Recommended PHP Functions
The PHP functions below are recommended but not required.
proc_opens
proc_close
File Permissions
- All folder permissions: 755
- All file permissions: 644
- .env file permissions: 640
Installation With Cpanel
Creating a new database
Before installing, you will need to create a new database. If you already know how to do this or have already created one, skip to the next step.Please use empty database. In most cases you should be able to create a database from your cpanel.
Before installing, you need to create a new, empty database. If you already have a database, skip to the next step. You can usually create a database from your cPanel.
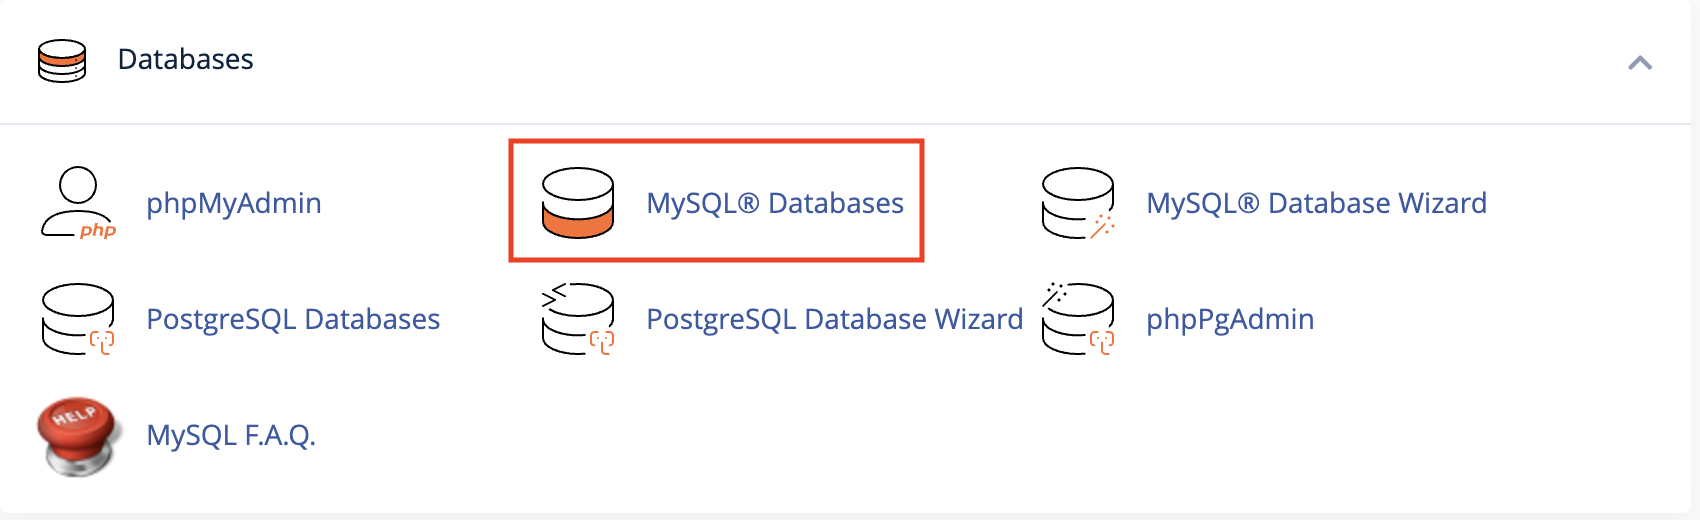
- Log in to your cPanel or server control panel.
- Navigate to the "Databases" section and click on "MySQL Databases." (Note: The exact steps may vary depending on your hosting provider.)
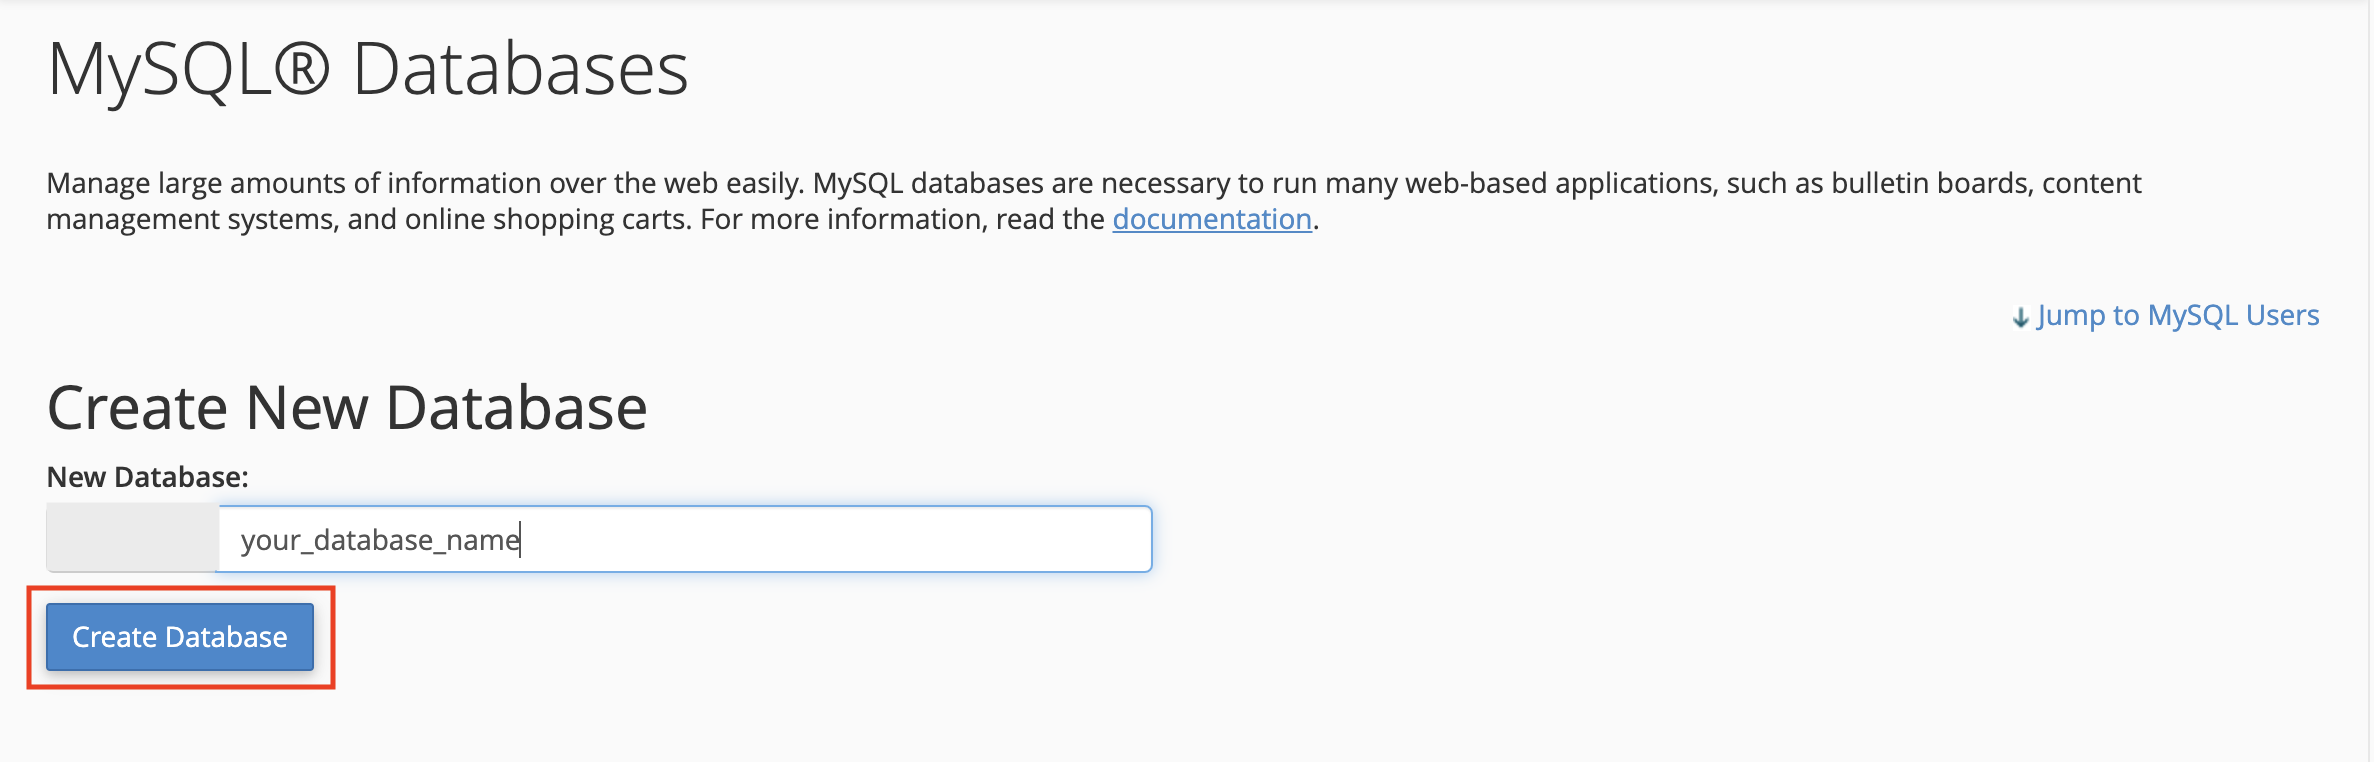
- Click "Create Database." The new database will appear in the "Current Databases" section.
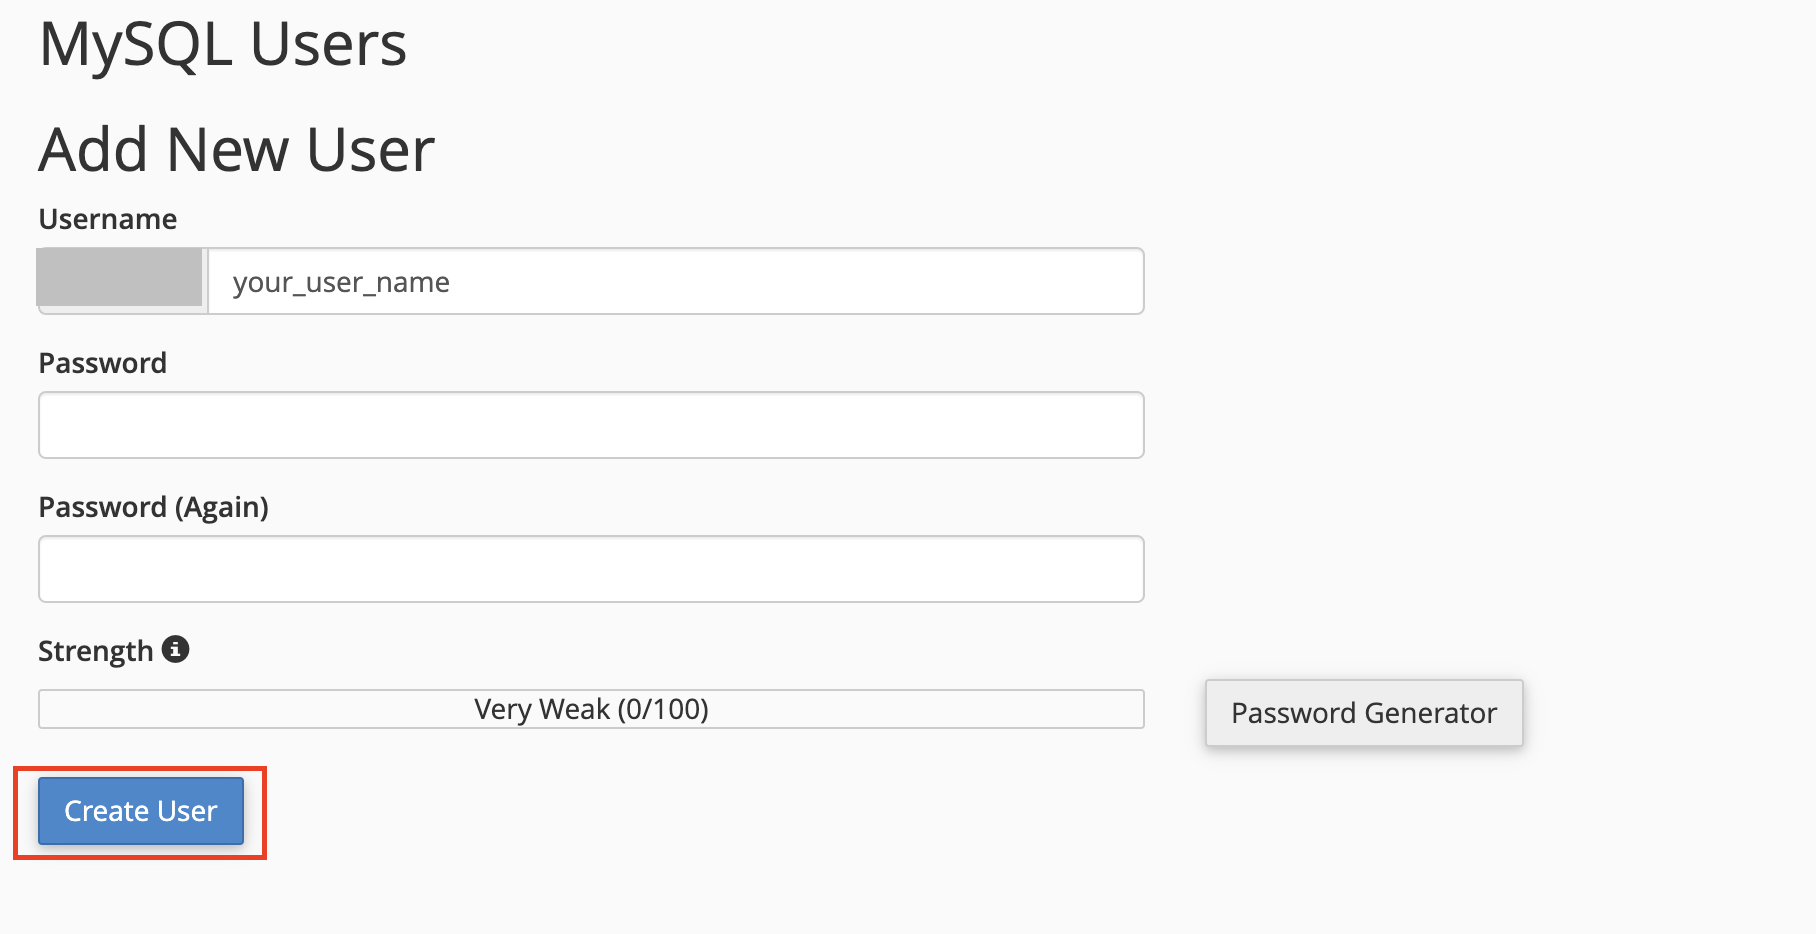
- Create a user and set up a password for the user. Write down the username and password as you will need them later during the installation.
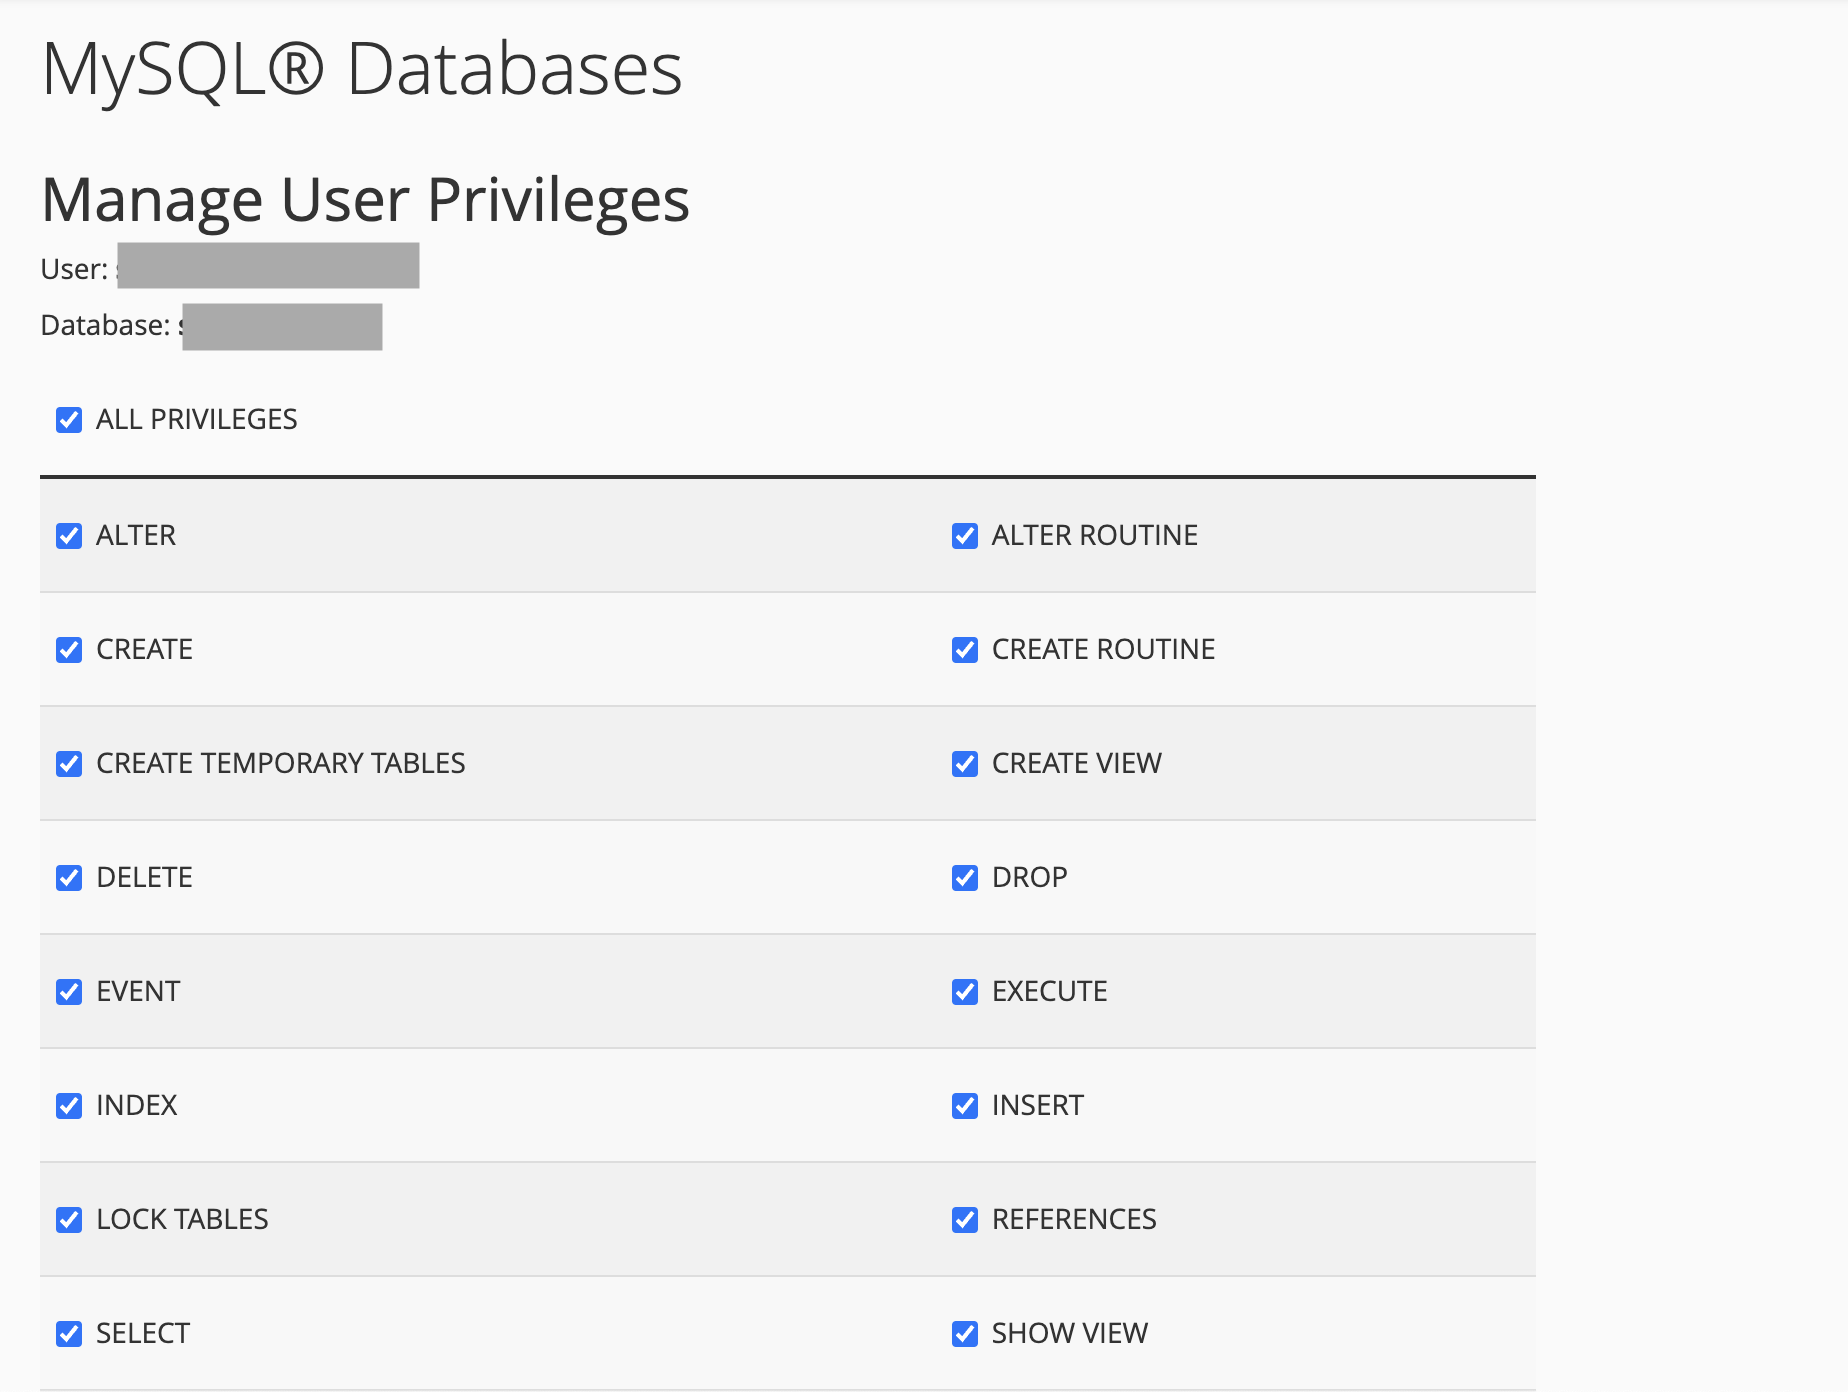
- Add the user to the database by selecting the database and username. Ensure you check "All privileges" when adding the user to the database.
Useful resources
Now you need to create a new user. On the same page go to create a new database user
Now add the user to the database
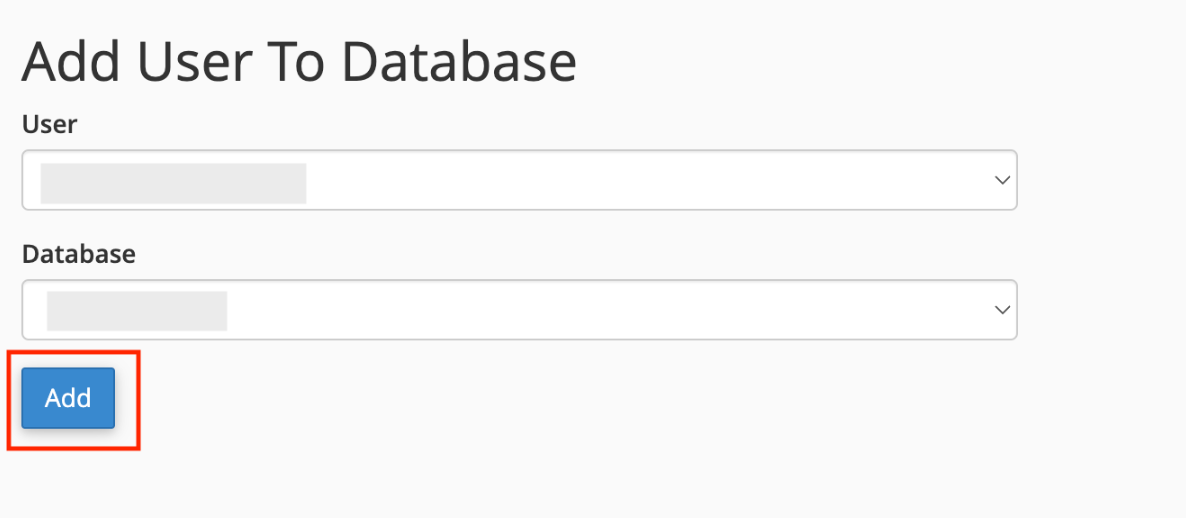
And select full permissions on the database to that user
Installation
Installing InvoiceX
The following instructions will guide you through the installation of InvoiceX. The application comes with an easy-to-use installation wizard that will take you through the process step by step.
Step One: Perform Install
Assuming you have created the database and uploaded the files as explained in the previous steps, follow the instructions below to begin the installation process.
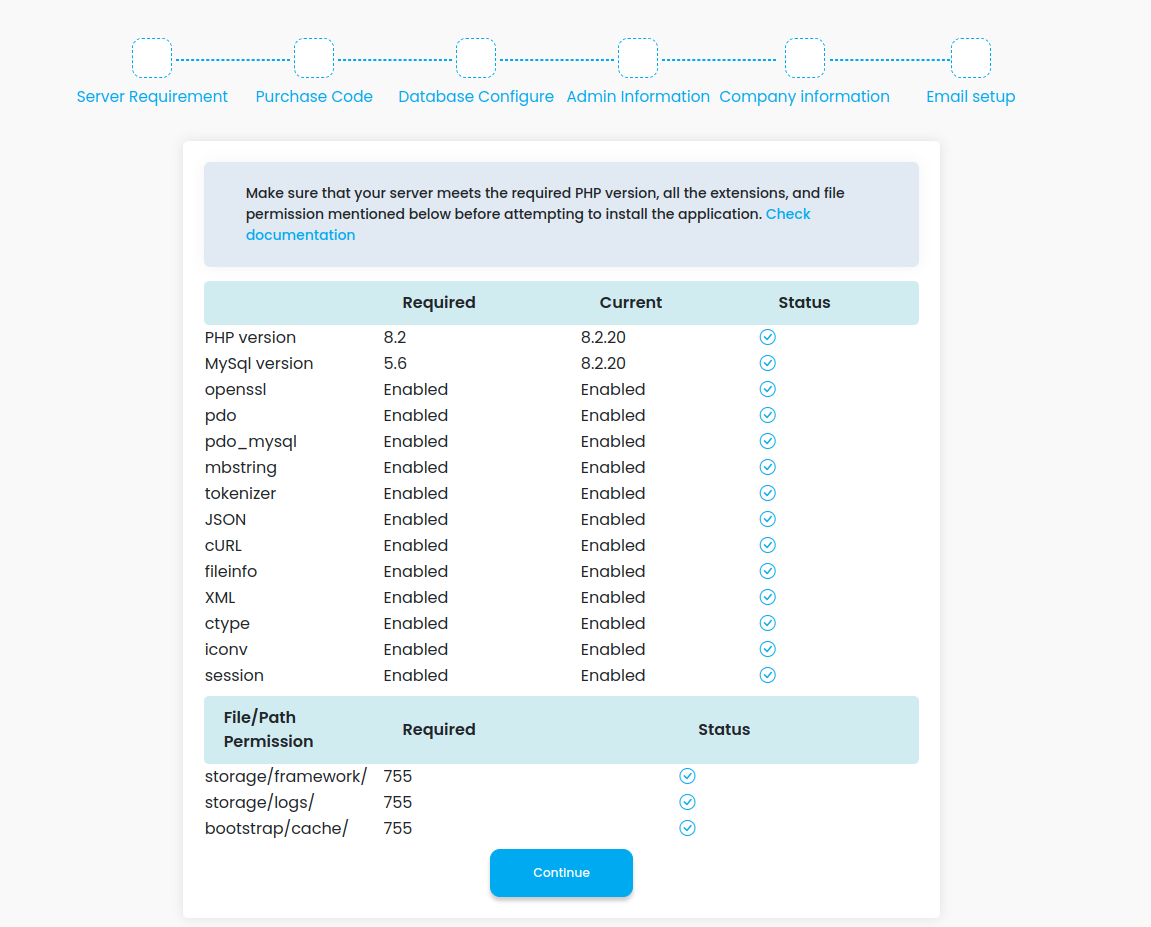
- In your browser, navigate to yourdomain.com/installation (replace yourdomain.com with your actual domain).
- If all server requirements are met, click "Next." If any requirements are not met, consult with your hosting provider to fix or enable them.
- If all permissions are met, click "Next" to set up the application data. If any permissions are not met, set 755 permissions for the specified folders. If you are managing the server, see "Permissions, User, and Group" for more details.
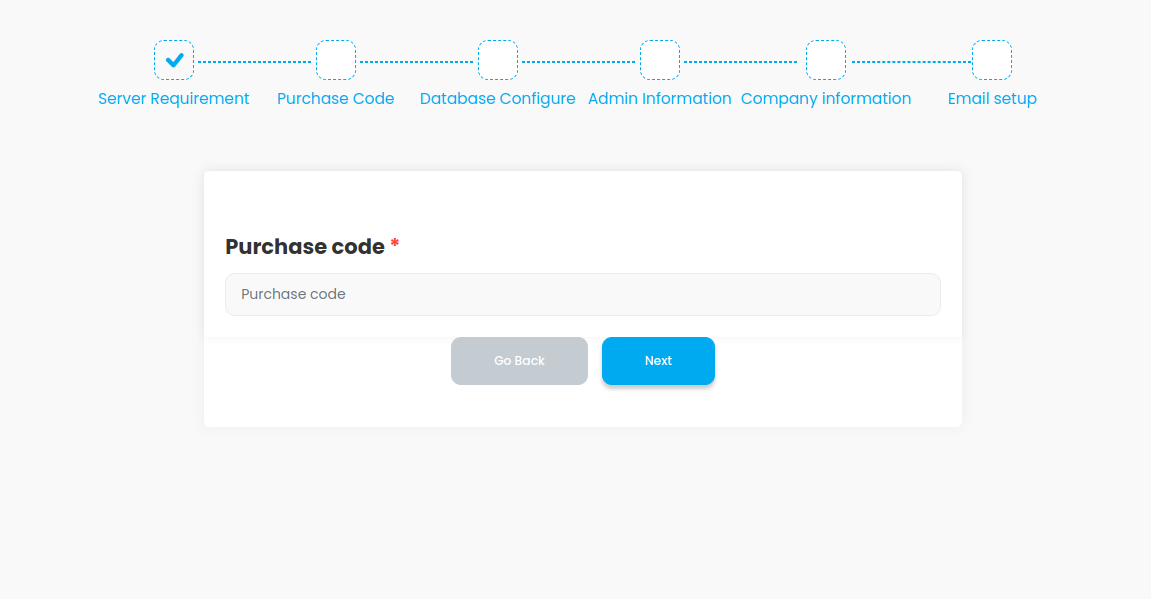
Step Two: Verify Purchase Code
Enter the correct purchase code. Once verified, you will be redirected to the next step. If you need help finding your purchase code, refer to this purchase code guide.
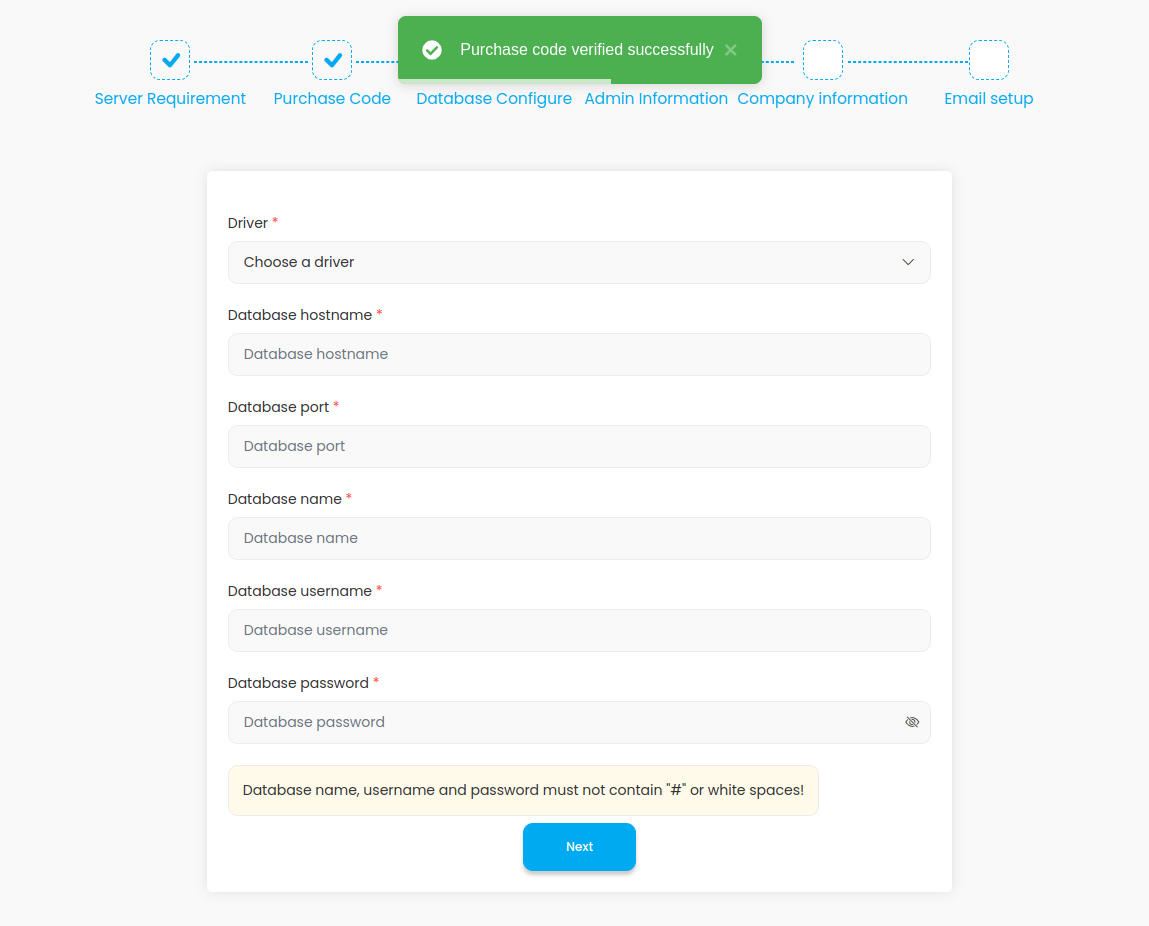
Step Three: Configure Database
Add the database configuration in the installer:
Database Connection: Choose your database connection type.
Hostname: Enter the database hostname. In most cases, the default hostname is "localhost." If
it's different for your setup, enter the correct hostname.
Port: Enter the database access port. The default port is 3306.
Database Name: Enter the name of your database.
Database User: Enter the database username.
Database Password: Enter the database user's password. If the user does not have a password
(common in local installations), leave this field empty.
After filling in all the fields, click the "Continue" button.
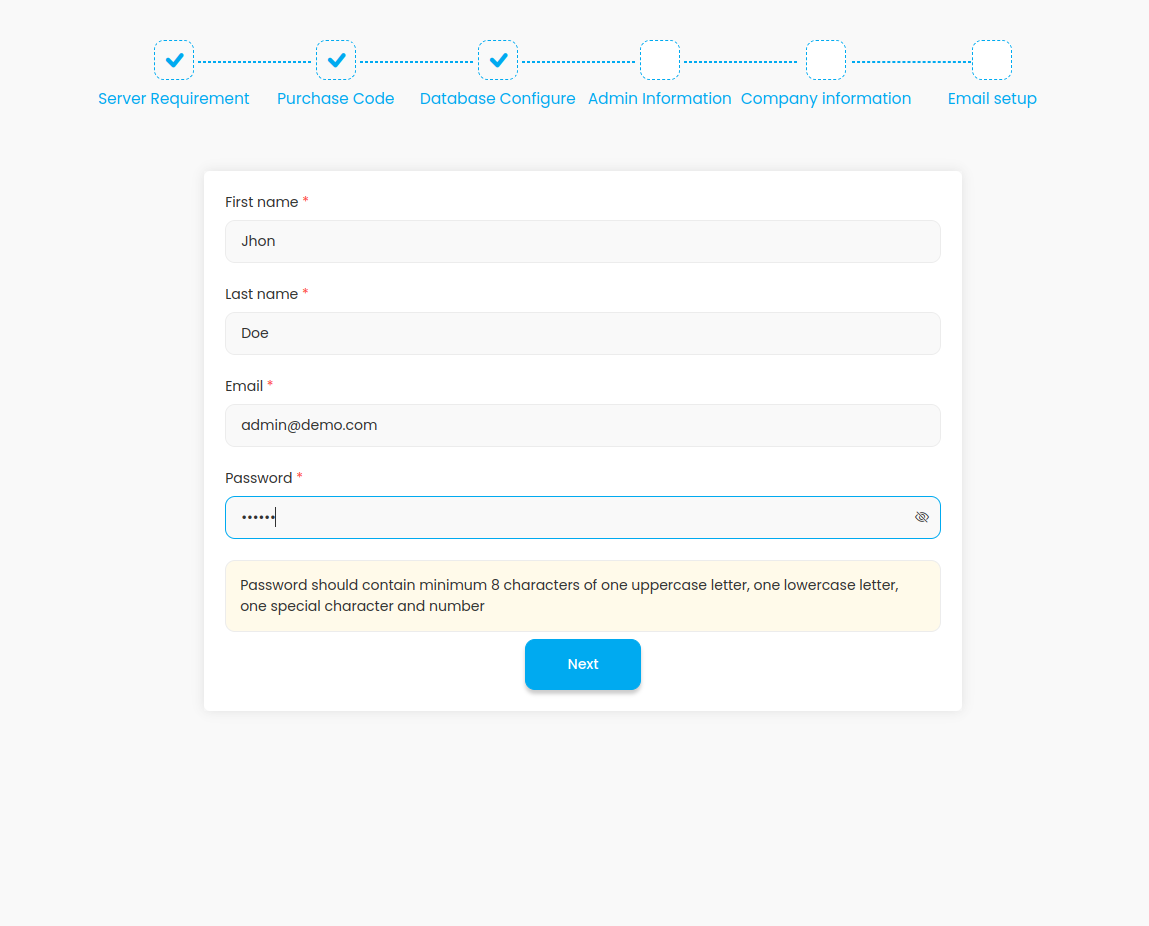
Step Four: User Information
Enter your admin user information. After filling in all the fields, click the "Next" button.
Step Five: Company Information Setup
Enter the following company information: Company Name, Phone Number, Address, Company Logo, Icon, and Banner.
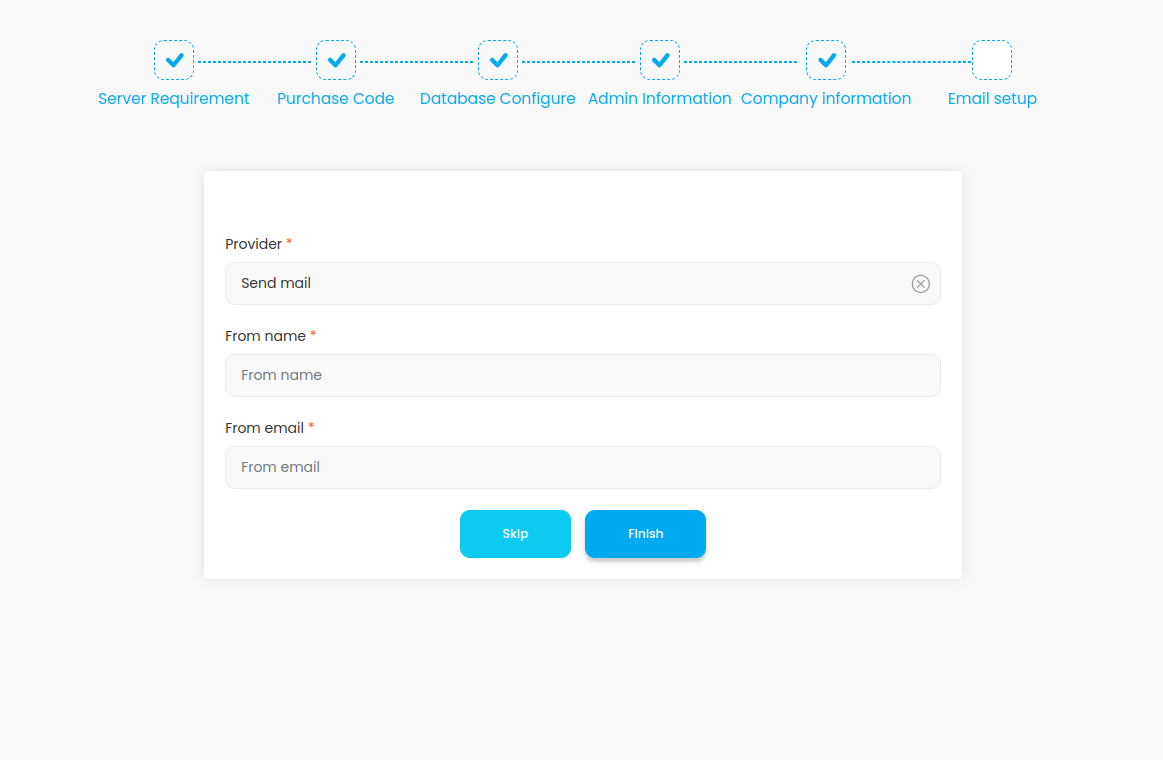
Step Six: Email Setup
Choose a service provider: SendMail or SMTP.
Installation Finished
After completing all the installation steps, you will be redirected to the application login page. Go to the settings to configure the application before starting to use it.
Configuration
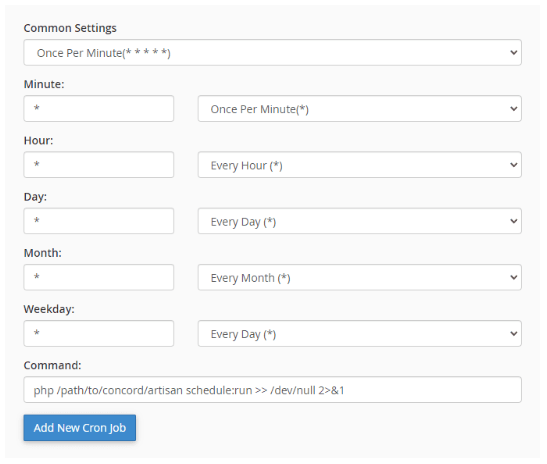
Cron job
The application requires a cron job task to be set up on your server to automate some of its functions.
- Navigate to Application > App Setting > Cron Job.
- Copy the command from the Command field and set up a cron job that runs every minute.
Useful resources
cPanel - Cron jobs
Plesk - Scheduling tasks